This is what an online class looks like
Content Table
Transitioning between traditional education and online education can be a harsh and overwhelming task. However, there are certain advantages that can tip the scales in favor of online classes. There are a number of reasons why online education is now in a great place and is enjoying quite a bit of popularity. But what are those multiple perks that make this learning method so popular?
- Flexibility: learn whenever and wherever you want. There are no barriers to learning and you can make with your time whatever you feel like. This is a type of education that lets you balance work, studies, family, and social life. You don’t have to give up anything in order to learn a new language.
- Customized education and lessons: the rhythm of the class is set by your own needs and wants. The teacher can focus their attention solely on the student and provide the tools needed to achieve their goals.
- Comfort: not unnecessary commuting anymore. You can learn from the comfort of your cozy sofa at home. This is extremely beneficial if you have a place that is both homelike, comfy, and far from any distractions.
- Wide range of courses: online learning offers a wide variety of options in both learning methods and subjects to choose from. From university degrees to two-week courses of graphic design, everything is on the net. This allows you to have more than one option, and if something doesn’t work, you can try something else.
- Saving: online learning tends to be far cheaper than conventional methods in terms not only of money but also time. In traditional education, the student has to travel in person to the classroom and waste precious time of their day and probably money on transportation. Even if we don’t take that into account, most of the available options in online learning offer more competitive prices than traditional academic courses.
¿What do you need to start your online classes?
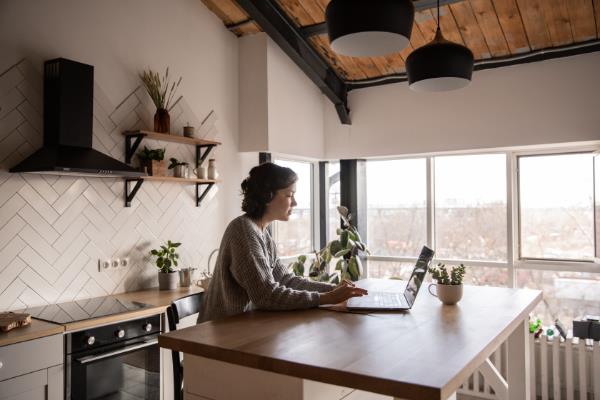
If this is your first time trying online education, it’s completely normal to raise the question: ¿Where should I start? The answer is easier than it looks. You start with a good computer and a good internet connection. You have to remember that the right equipment can make all the difference between a good lesson and a bad one.
That’s why you should have or purchase a good computer. And it’s even better if this laptop/computer has a good microphone, working speakers and a decent webcam. Also, make sure that your Wi-Fi connection is optimal. But, in case your computer doesn’t have those tools, we encourage you to have the following:
- Headphones: although the speakers could be working fine, it’s better to have in hand a good set of headphones. Why? Sometimes, your surroundings may not be as quiet as you want to. However, headphones allow you to listen to your teacher perfectly in spite of where you at. These are some budget options for high-quality headphones:
- Klipsch T5 M Wired
- AKG K72
- JBL Reflect Flow
- JLab Go Air
- Webcam: this complement is usually integrated into every modern computer. However, if that’s not the case, it’s advisable to buy an external one (it doesn’t have to be expensive or high quality) so the teacher can see you and keep a more fluid and visual communication. This tool may seem unnecessary at first but it pays off in the long run.
- Microsoft LifeCam HD-3000
- Logitech HD Webcam C310
- Logitech C922 Pro Stream
- AUSDOM 1080P HD Webcam Camera with Built-in Microphone
- Microphone: is one of the most resourceful tools for online learning. It generally, almost always, is already integrated into the computer. However, if for some reason yours doesn’t work properly, you may need to get another one. Remember, online classes, are one-on-one tutoring, which means that both you and your teacher will have a conversation. A good microphone can make a difference between a quality lesson and an absolute disaster. Our recommendation is that you buy a good pair of headphones with a microphone integrated.
- Internet connection: if you’ve ever facetime someone, or made a Skype call, you will be familiar with the frustration of a bad signal. Not only is it a frustrating experience for you, but it’s really annoying too for the other person too. To avoid that, make sure you place yourself near a router or at least a place where you know you get good reception.

Classgap: the ultimate learning platform
This kind of learning is growing more and more popular every day. This just means that as time goes on, it’s becoming a more solid alternative to traditional education. It’s an opportunity to offer another chance to those students who don’t feel satisfied with a more conventional approach to learning. To be fair, online education does have more pros than cons.
As a result, in the last few years, we can notice a growing interest in this field with the appearance of platforms that offer this service. Their aim is to facilitate the transition and find the right tools to have a proper experience. Nowadays, these initiatives are looking for a way to simulate as realistically as possible a traditional classroom or student environment. Some, like Classgap, have accomplished this with great success.
How is an online lesson at Classgap?
Classgap offers besides a wide variety of teachers, a great online environment for the lessons, the virtual classroom.
Some tools available in the virtual classroom are:
- Shared screen
- Creation of Google Docs, presentation, Excel.
- Virtual whiteboard
- Option to share documents, presentations, excels.
- Option to share files and YouTube videos
- Different perspectives on the workspace: just audio, video, complete view
These are most of the options available inside the classroom. How you and your teacher use it is up to you. Depending on the subject, you will be able to use some more than others. Probably your tutor will be proficient and if you have any questions about the technical questions, they will be able to answer them. But if you have any problem with the online environment, Classgap has customer service at your disposal.
How to start:
- Choose an online teacher
- Plan a free trial on a convenient date and time. This trial will help you familiarize with the virtual classroom and learn more about your teacher.
- Check your schedule and book an hour to do the lesson. The time and date need to fit both your teacher and you.
- On the day of the class, you will access the virtual classroom from your computer or tablet. We advise you to keep your camera and microphone on.
- And… You are ready to learn!
How is an online Spanish class?
STEP ONE: To properly start the class, it’s important to open your chat, turn on the microphone, and plug in your headphones. You need to hear and to be heard. Usually, your teacher will have the webcam on and this will help you keep a closer relationship with them. If you don’t want to be seen, you can keep the webcam off for as long as you need it.
What about the chat? This is a great tool in case there’s any problem with your microphone, webcam, or internet connection. Ideally, if everything went according to plan, the lesson would go smoothly. We sometimes know mistakes happen, technical errors occur, and it is just as frustrating. The chat is the best way to still communicate with the teacher and to inform them of any problems.
STEP TWO: The teacher will choose the format in which you will work. You have the option of working through Google Docs, a presentation, or even through a virtual whiteboard. Both can make changes to the file because it's a shared document. This means that as the tutor explains, you can write down notes and explanations, and they can add their observations too.
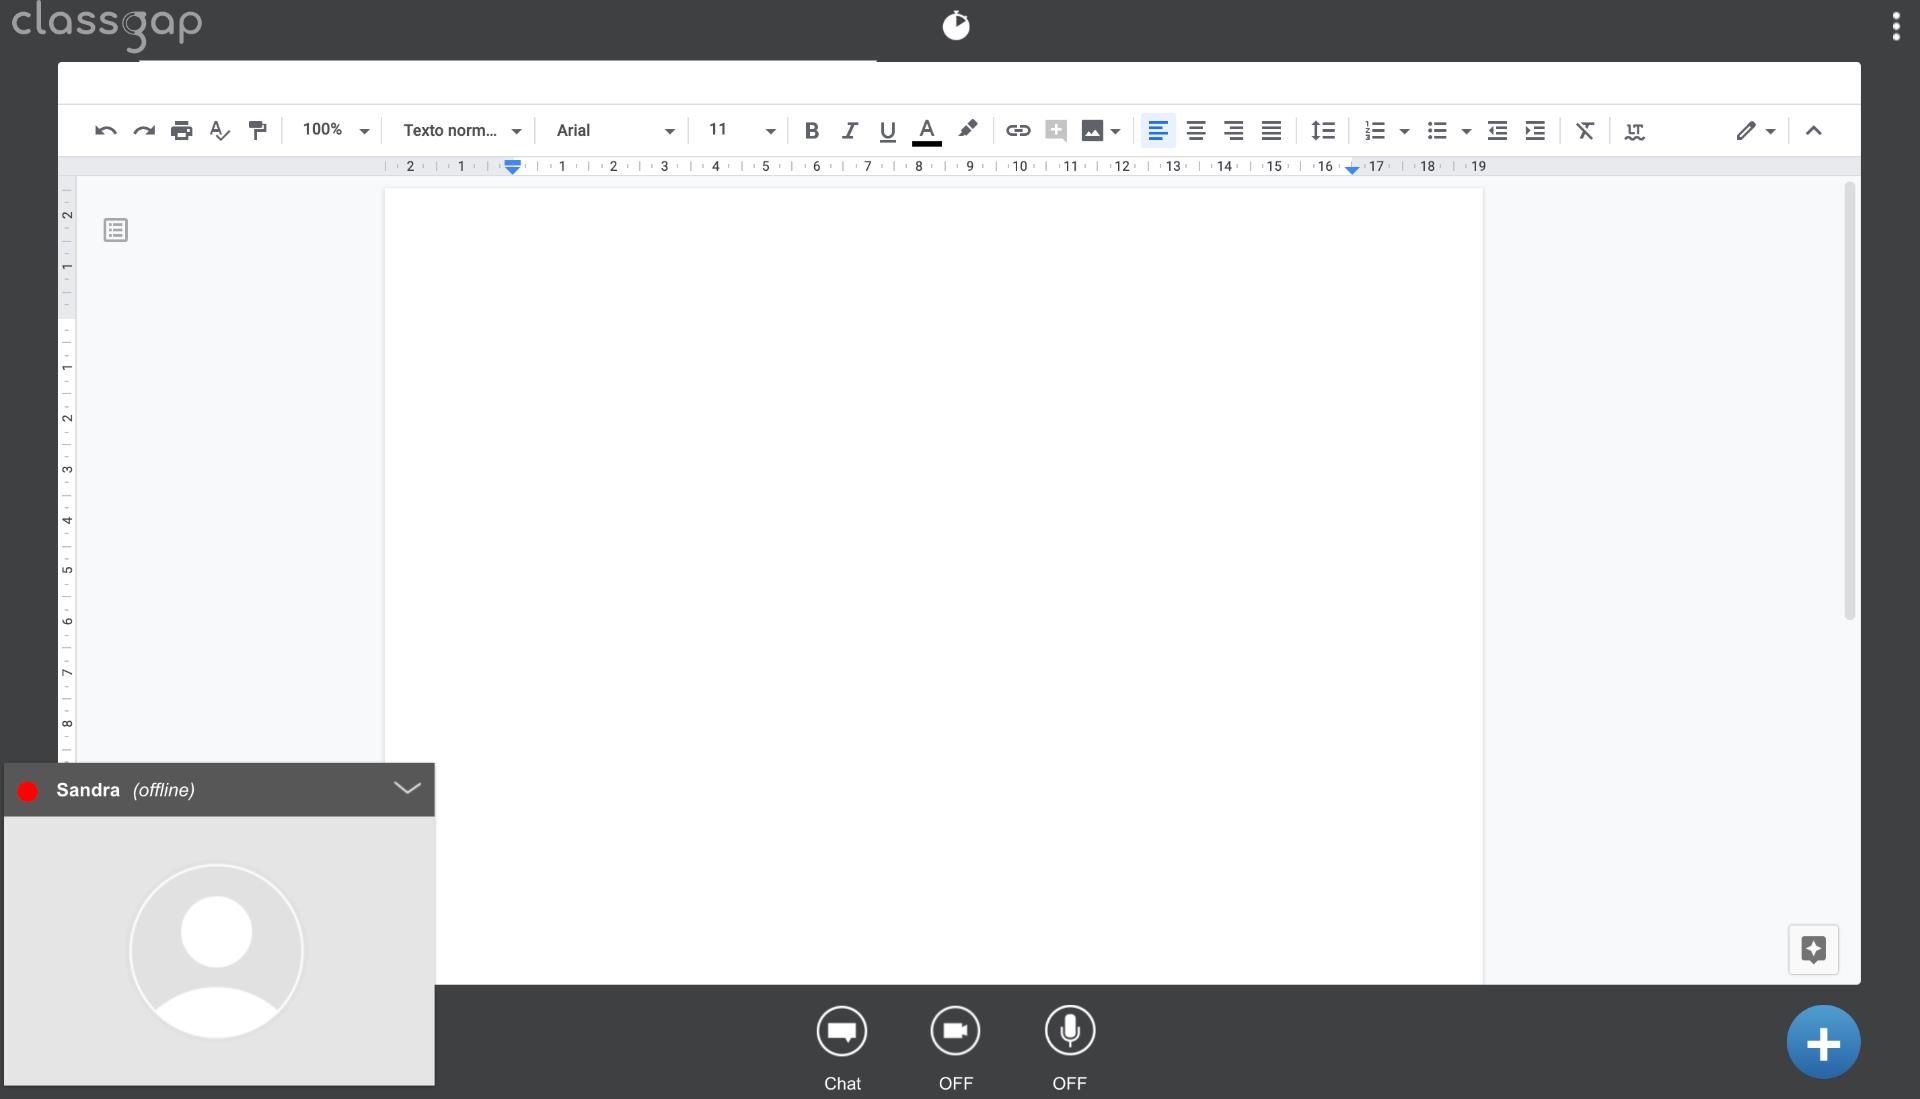
In general, an online Spanish class works better with a document or a presentation rather than with a virtual whiteboard. It’s the best way to introduce concepts, vocabulary, grammatical structures, etc. Having said that, when talking about a language, we also need to take into account all the different skills we need to train.
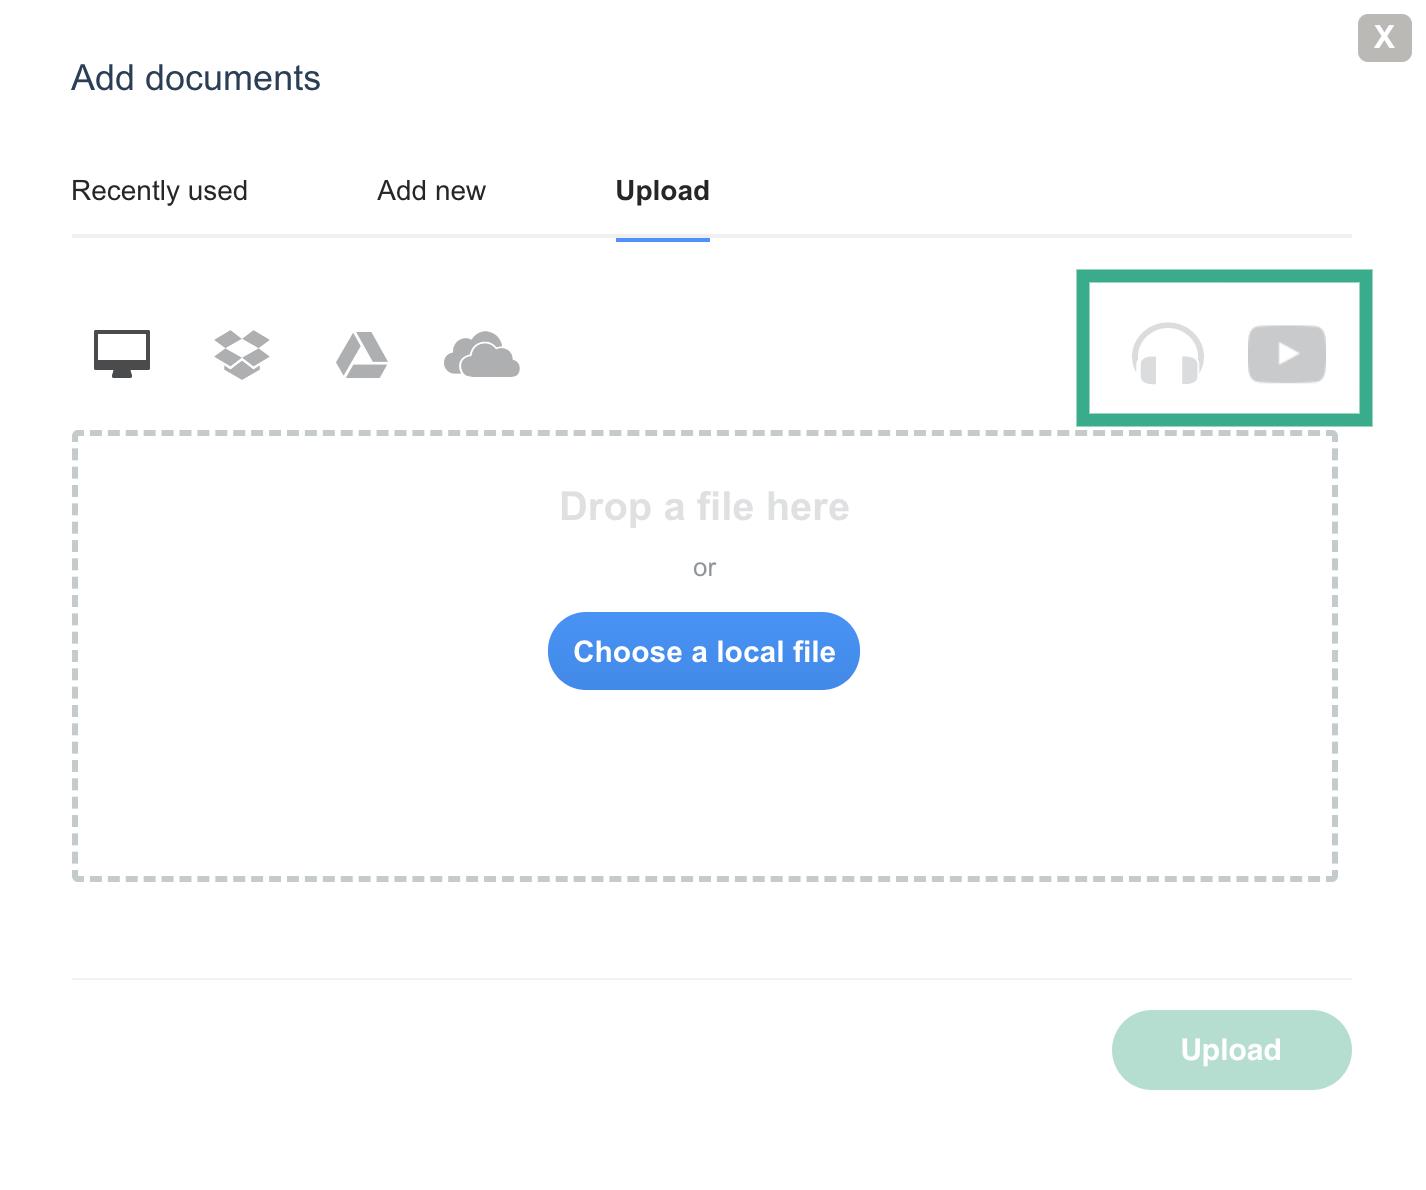
Despite the usefulness of the documents, presentations, etc, Classgap also allows you to share audio files, YouTube videos or photos, and videos from your laptop. This is a great way to train your ear and have access to other didactic material. This is an opportunity to make the most of your online learning.
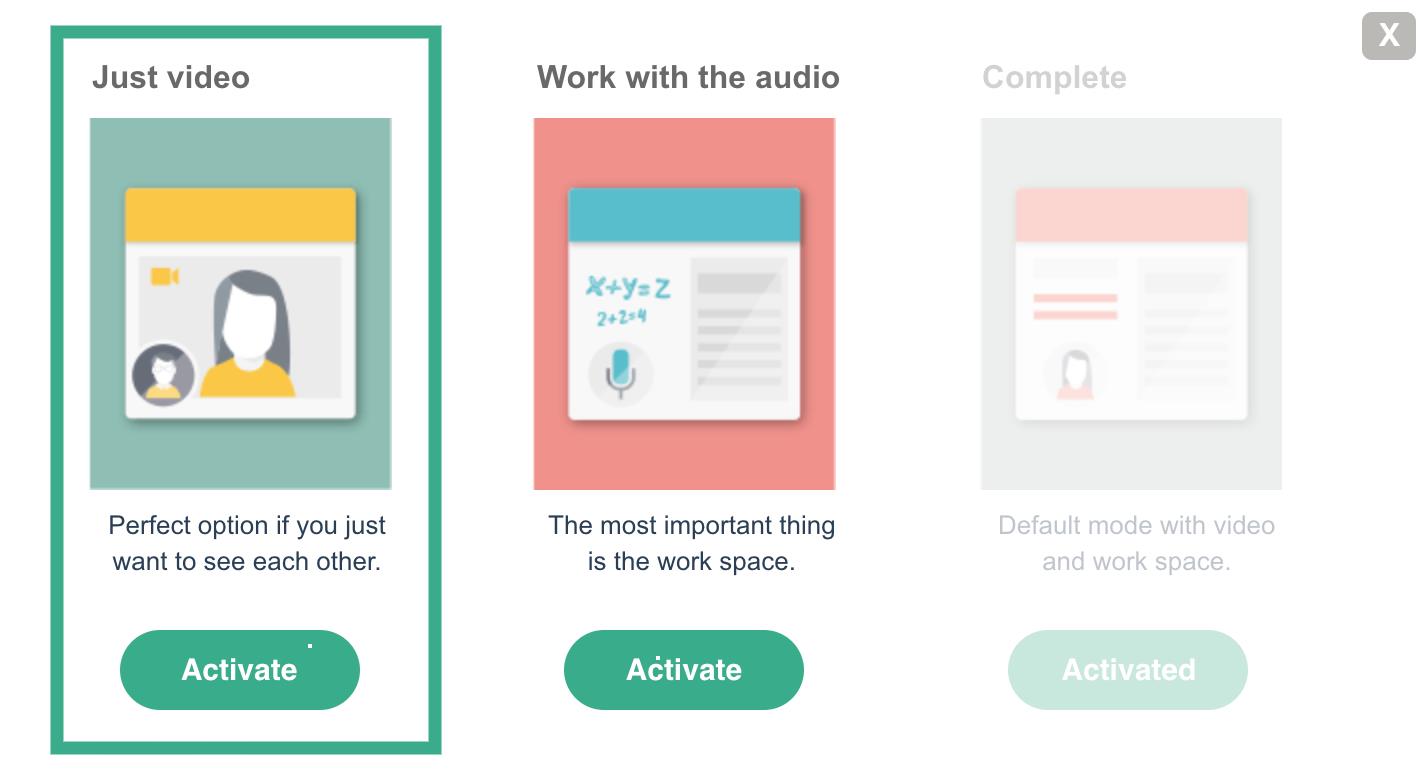
In the virtual classroom, there are three different views of your workspace: just video, just audio and workspace, and complete (video and workspace). If your ultimate goal is to practice your speaking or your pronunciation, you can choose the option to work with just video. This will allow you to see your teacher during the conversation and maintain a closer more personal interaction.
Beware: If you want to keep the documents at the end of the class, make sure to download them before leaving the virtual classroom.
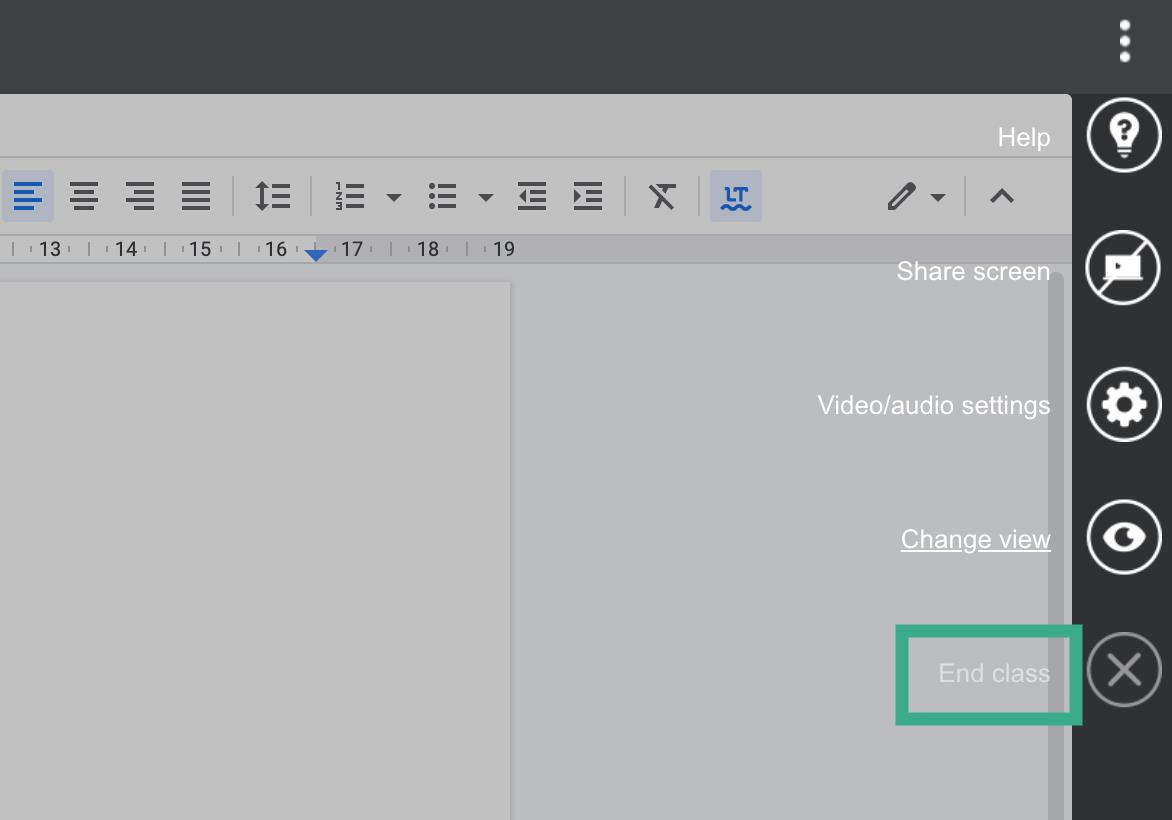
STEP THREE: Once the class is finished, you only need to click the button on the right down corner of the screen to access the menu and choose “end class”. If you liked your teacher and the lesson remember to write a positive review. Your opinion is really important to other users.
How is an online maths class?
STEP ONE: The moment you decide to start the class, make sure to have a microphone and headphones on. You can also open your chat in case there’s a bad internet connection at some point. Again, you can activate the webcam or you can proceed without it. It’s up to you if you want the teacher to see you.
Learn maths with a private online tutor
STEP TWO: Once you and your tutor are in the classroom, it’s time to choose the format of the lesson. As previously mentioned, you have multiple options: work on google documents, presentations, and also Excel and a virtual whiteboard. This is important because on the shared file both parties can work together and modify it.
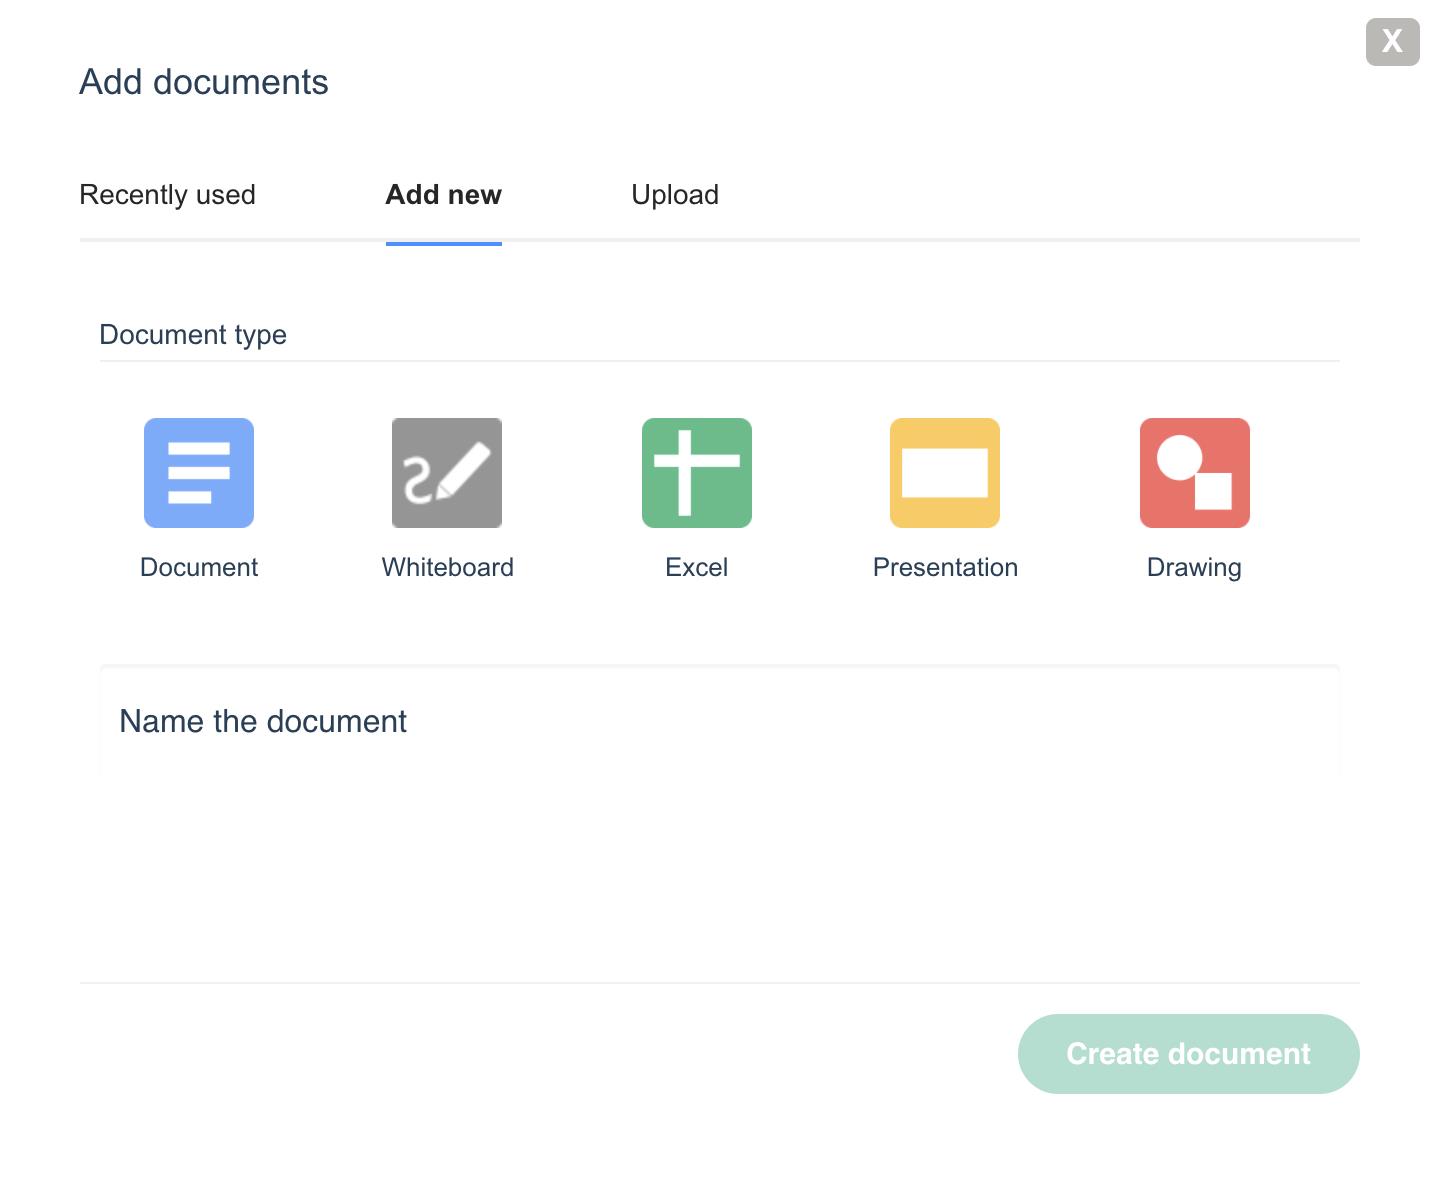
When it comes to math, the most useful tool of the shed is probably the whiteboard. Why? Well, it basically allows you to draw any form, shape, or graphic that you want. It’s a very visual way to present the concepts. If you are working with graphics or equations, it allows for more collaborative work between the teacher and the student too.
It’s also really useful to share notes and exercises so that you can practice the theory, done in school, high school, or university. This means that the teacher can give you some guidelines on how to approach each problem and you can solve it on your own. The chance to share files can become essential for the student who needs tutoring on a certain subject for an exam or with their homework.
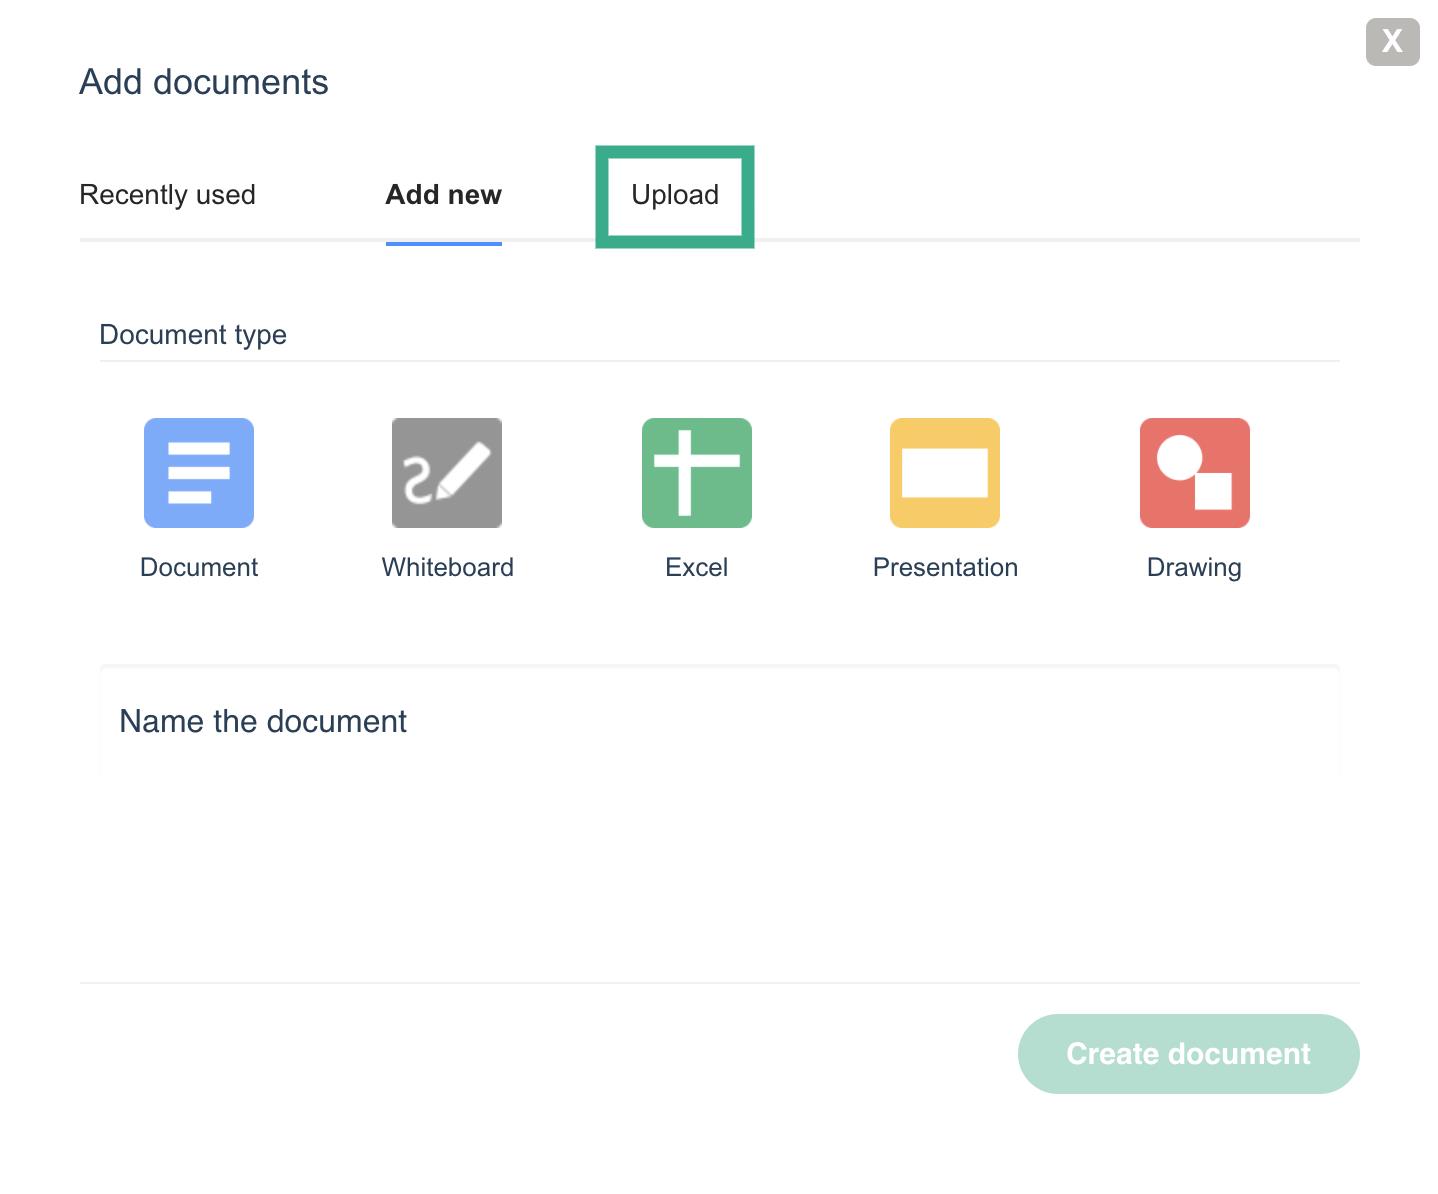
Beware: If you leave the classroom, remember to always download the documents used in the class. Otherwise, they will be deleted for good.
STEP THREE: If your hour has passed and you’ve learned everything you needed to learn, it’s time to end the class. Access the menu on the right and press “end the class”. Once you leave the classroom, make sure to leave a positive review on your teacher’s profile. It’s really helpful for both him and other users looking for a good tutor.
How is an online programming class?
STEP ONE: Before you start, check your equipment and make sure it works perfectly. Turn on your microphone and plug in your headphones. It’s important that your teacher hears you and you hear him. Additionally, make sure you open your chat in case there’s a problem during the lesson with your internet reception.
Choose the best programming teacher
STEP TWO: Now that you and your teacher are in the virtual classroom, it’s time to start the lesson. When talking about code-writing, you will probably work better on the programming languages if the teacher shares their screen. This option is available on the menu on the right side of the screen. This will allow you to see what your teacher is writing so you can do the same on your computer.
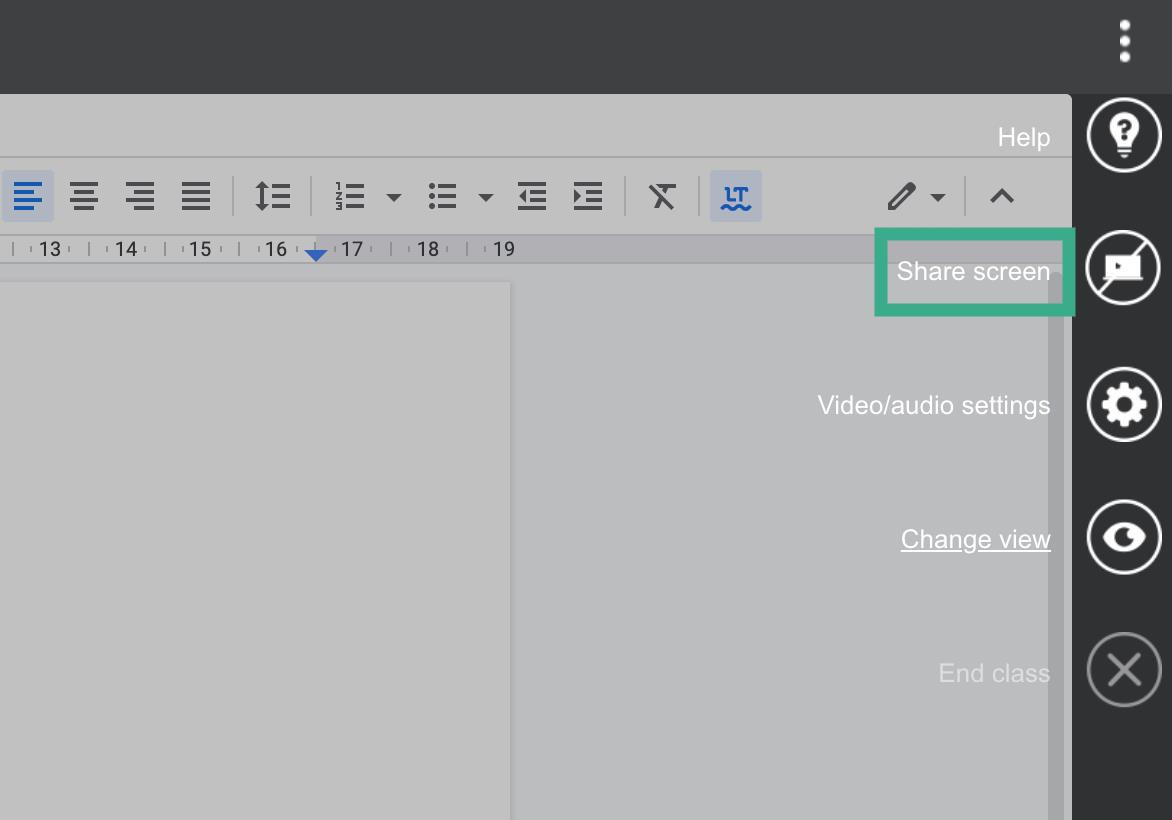
The virtual classroom also has other options, so the shared screen is helpful but you can still access all the other tools. Both teacher and student can share and create google documents, presentations, and other files. One of the best things about Classgap is the versatility it offers when it comes to learning.
Beware: If you want to keep the documents used during class, don’t forget to download them at the end of the session before leaving the virtual classroom.
STEP THREE: At the end of the lesson, you only have to access the menu on the right and choose the option “end class”. Once you leave the virtual classroom, it’s really helpful if you rate your teacher so that others know your opinion. You can write a positive review and let them know about your experience.
Now that you’ve uncovered how is an online class, ¿why don’t you give it a try? Classgap is the perfect place to start and you will find amazing teachers out there with a lot of years of experience. If you still have doubts, book a free 20-minute trial and make sure it’s the right option for you. So, ¿what do you say? ¿Are you ready?
